Witam,
chodzi mi o przyciski na lewo od kolumny kierownicy, jest tam m.in. pokrętło do regulacji świateł – jak przy nim wymienia się żarówkę, oprawkę można bez problemy wyjąć czy konieczny jest demontaż większej ilości plastiku?
Z pozdrowieniami...
Pokrętło reg. świateł – żarówka
Strona 1 z 1

![]() przez vqsoft » 17 gru 2009, 20:55
przez vqsoft » 17 gru 2009, 20:55
przerabiałem to samo parę dni temu
ja delikatnie zdjąłem plastikowy próg, zdjąłem uszczelkę na słupku i wtedy delikatnie odgiąłem tą obudowę
i wycisnąłem przełącznik regulacji
następnie z niego wykręciłem oprawkę z żarówka
i tu niespodzianka
nowa żarówka w aso to 34pln
heh
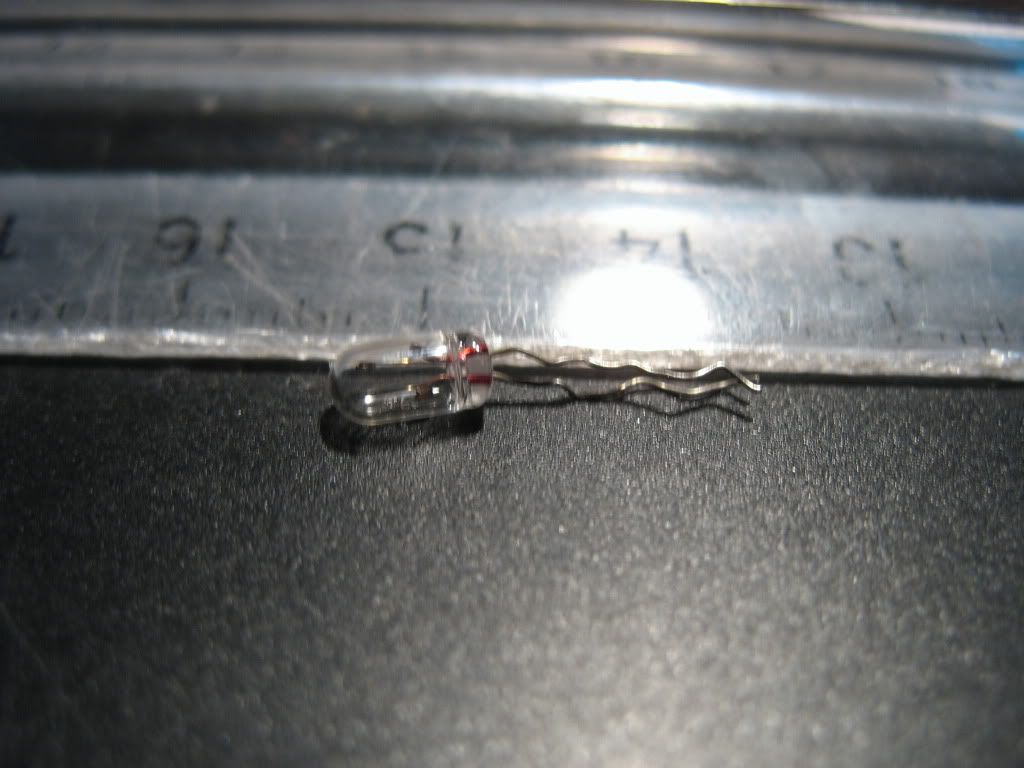
wymontowałem żarówkę z oprawki i zdjąłem z niej silikonową osłonkę która ma za zadanie zabarwic żarówkę na pomarańczowo
podjechałem z żarówka na wolumen i dokupiłem identyczna
za uwaga 50 groszy
wszystko ładnie zmontowałem i działa pięknie
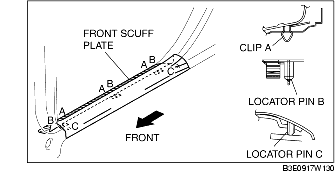
1. Pull the front scuff plate upward, detach clips A, locator pins B and C from the body, and then remove the front scuff plate.
2. Install in the reverse order of removal.
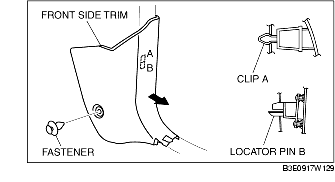
3. Remove the front scuff plate. (See FRONT SCUFF PLATE REMOVAL/INSTALLATION.)
4. Remove the fastener.
5. Pull the front side trim in the direction of the arrow and detach clip A and locator pin B.
6. Install in the reverse order of removal.
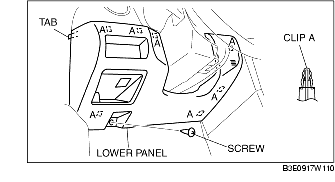
7. Remove the screw.
8. Pull the lower panel outward, and detach clips A and tab.
9. Disconnect the panel light control switch connector and the headlight leveling switch connector.
9. Remove the lower panel.
10. Install in the reverse order of removal.
ja delikatnie zdjąłem plastikowy próg, zdjąłem uszczelkę na słupku i wtedy delikatnie odgiąłem tą obudowę
i wycisnąłem przełącznik regulacji
następnie z niego wykręciłem oprawkę z żarówka
i tu niespodzianka
nowa żarówka w aso to 34pln
heh
wymontowałem żarówkę z oprawki i zdjąłem z niej silikonową osłonkę która ma za zadanie zabarwic żarówkę na pomarańczowo
podjechałem z żarówka na wolumen i dokupiłem identyczna
za uwaga 50 groszy
wszystko ładnie zmontowałem i działa pięknie
1. Pull the front scuff plate upward, detach clips A, locator pins B and C from the body, and then remove the front scuff plate.
2. Install in the reverse order of removal.
3. Remove the front scuff plate. (See FRONT SCUFF PLATE REMOVAL/INSTALLATION.)
4. Remove the fastener.
5. Pull the front side trim in the direction of the arrow and detach clip A and locator pin B.
6. Install in the reverse order of removal.
7. Remove the screw.
8. Pull the lower panel outward, and detach clips A and tab.
9. Disconnect the panel light control switch connector and the headlight leveling switch connector.
9. Remove the lower panel.
10. Install in the reverse order of removal.


Strona 1 z 1
Kto przegląda forum
Użytkownicy przeglądający ten dział: Brak zidentyfikowanych użytkowników i 13 gości